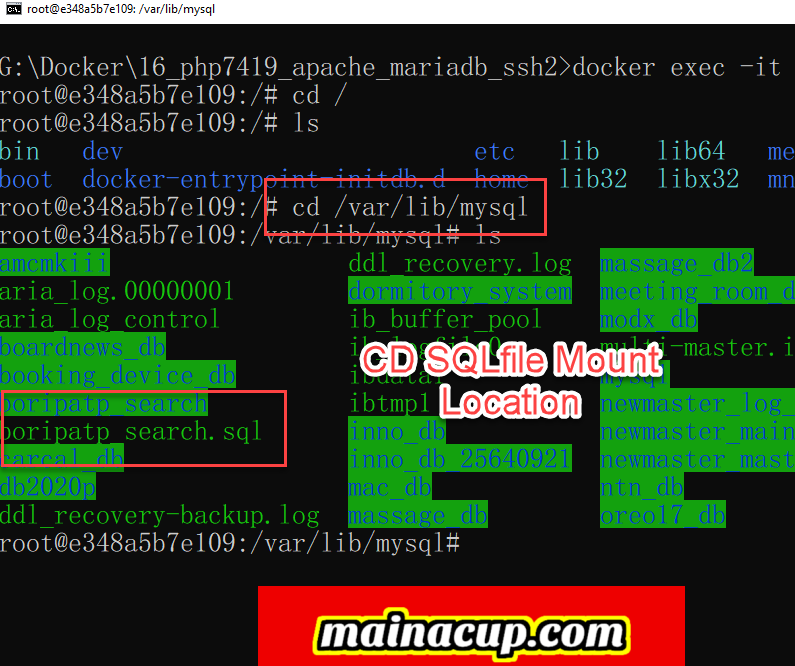
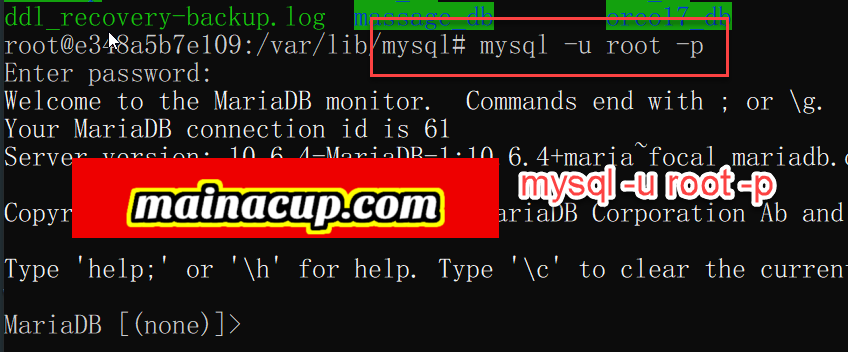
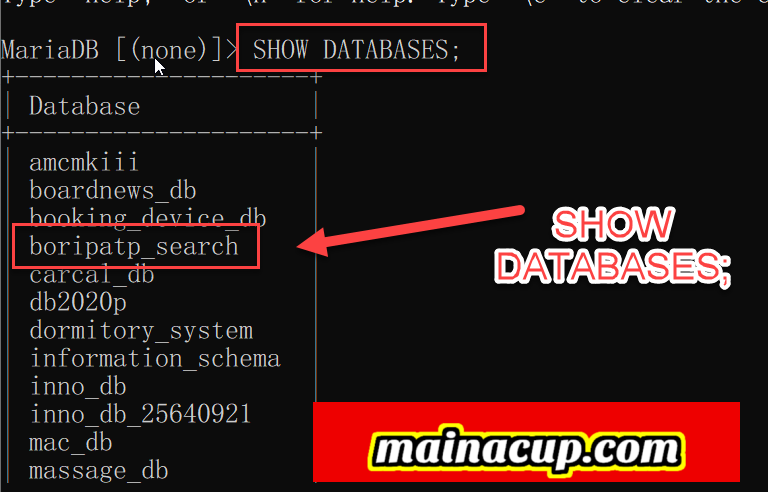
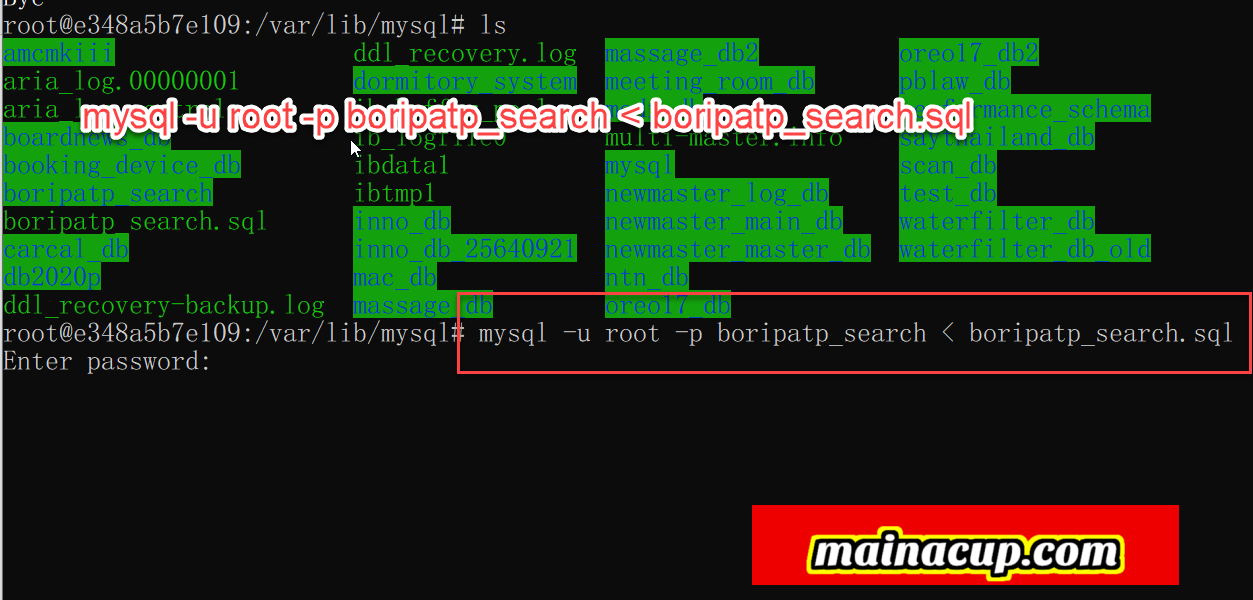
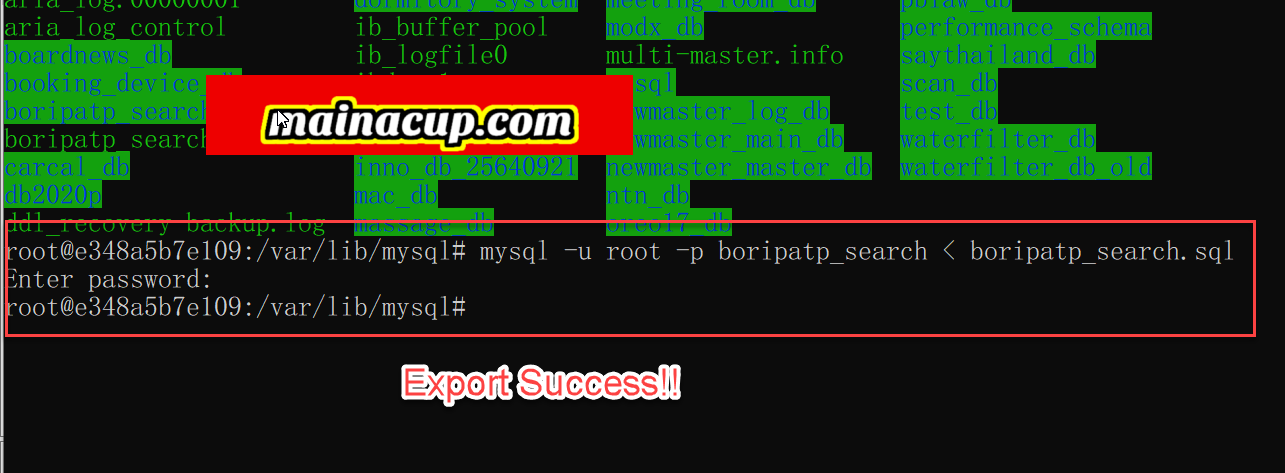
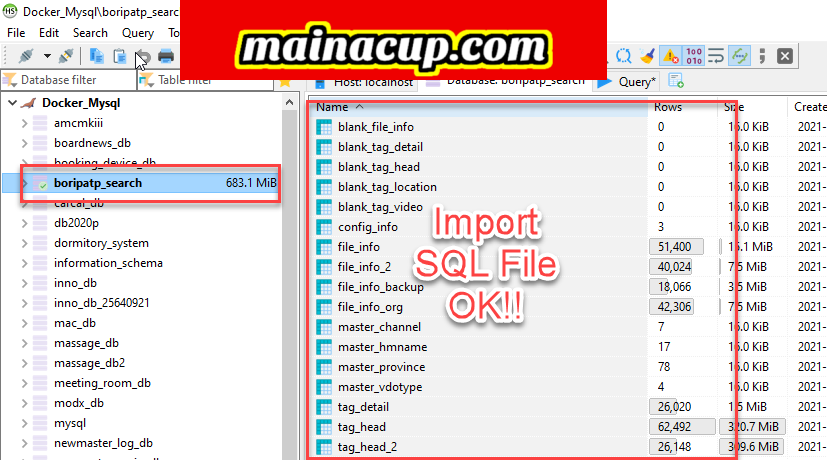

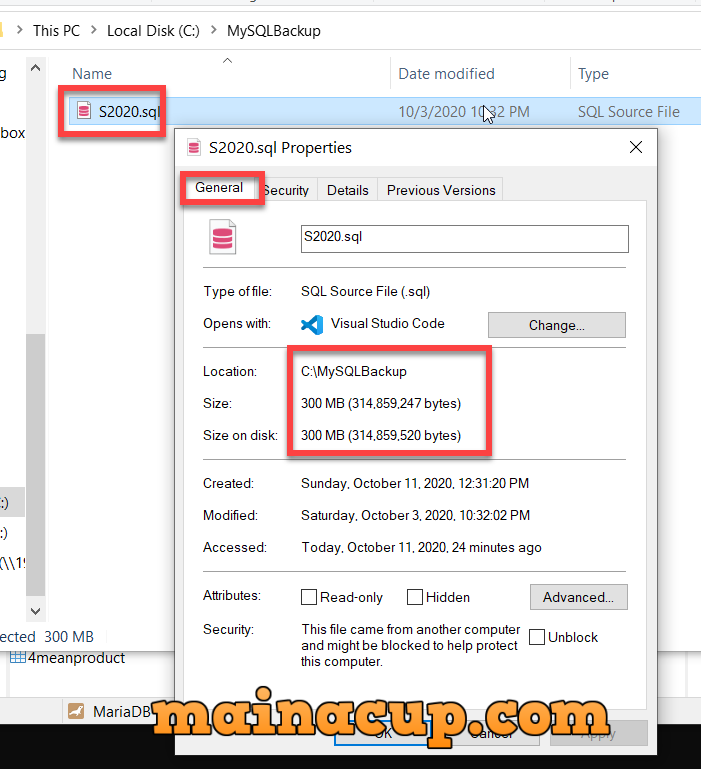
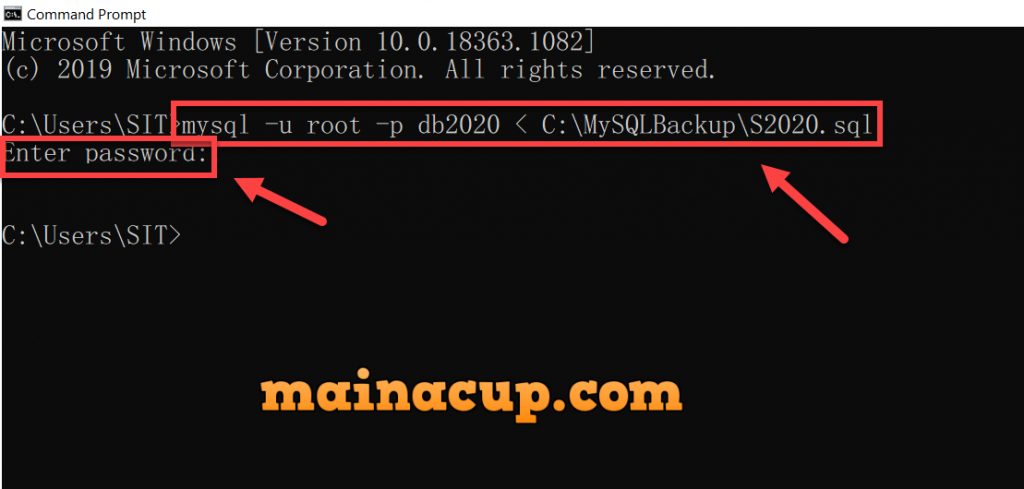

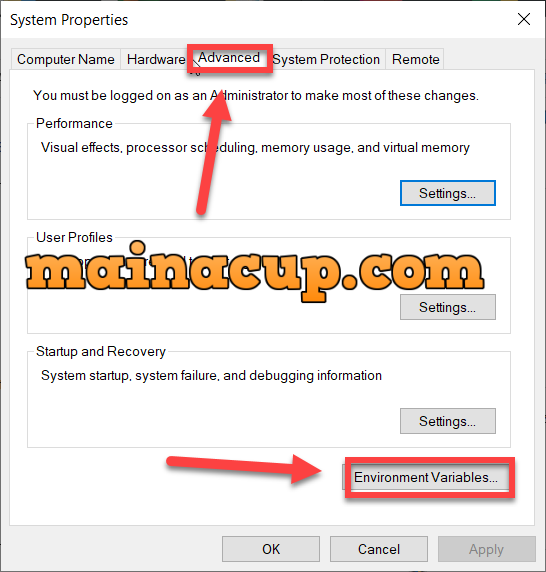
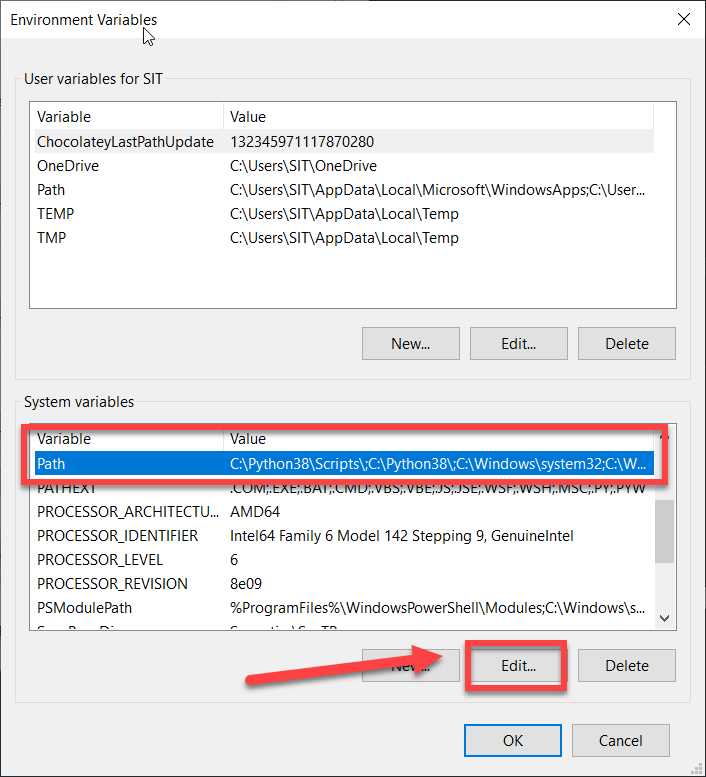
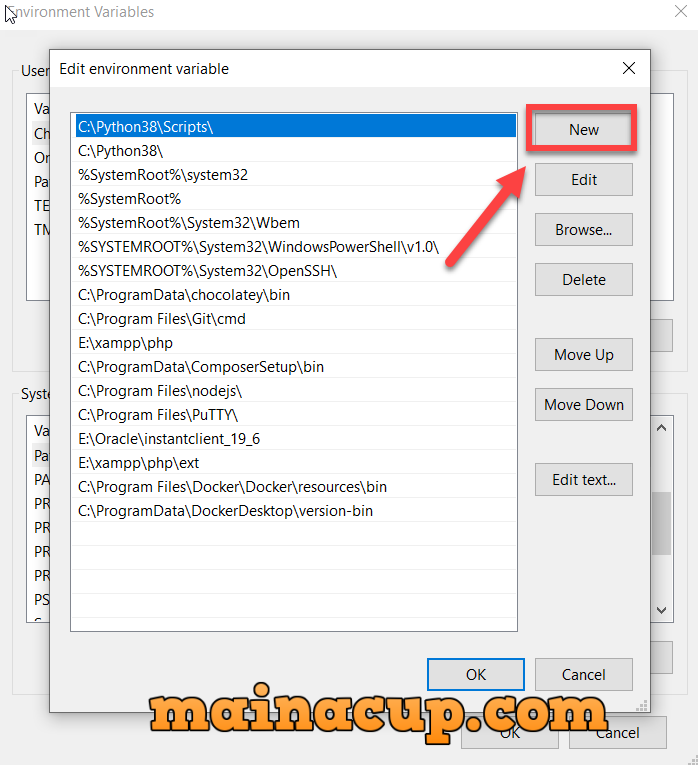
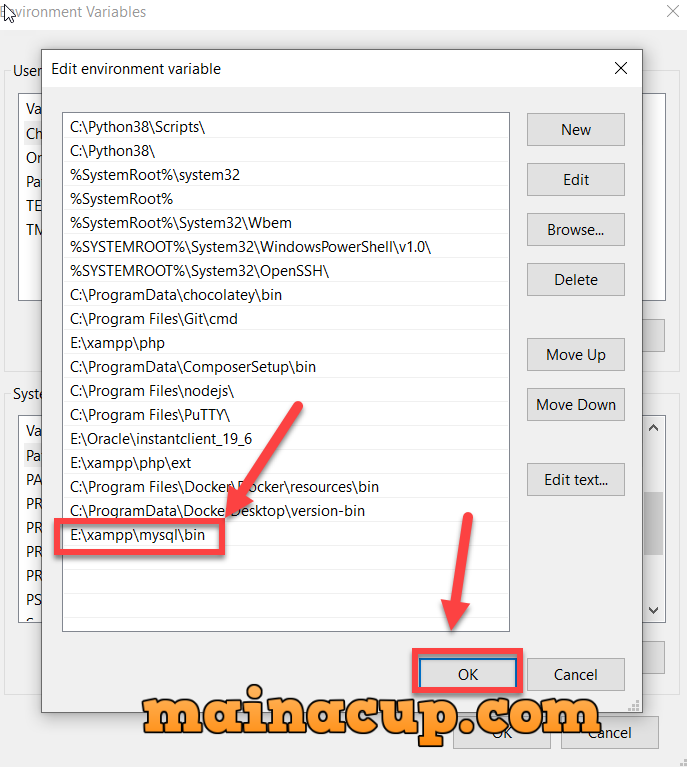
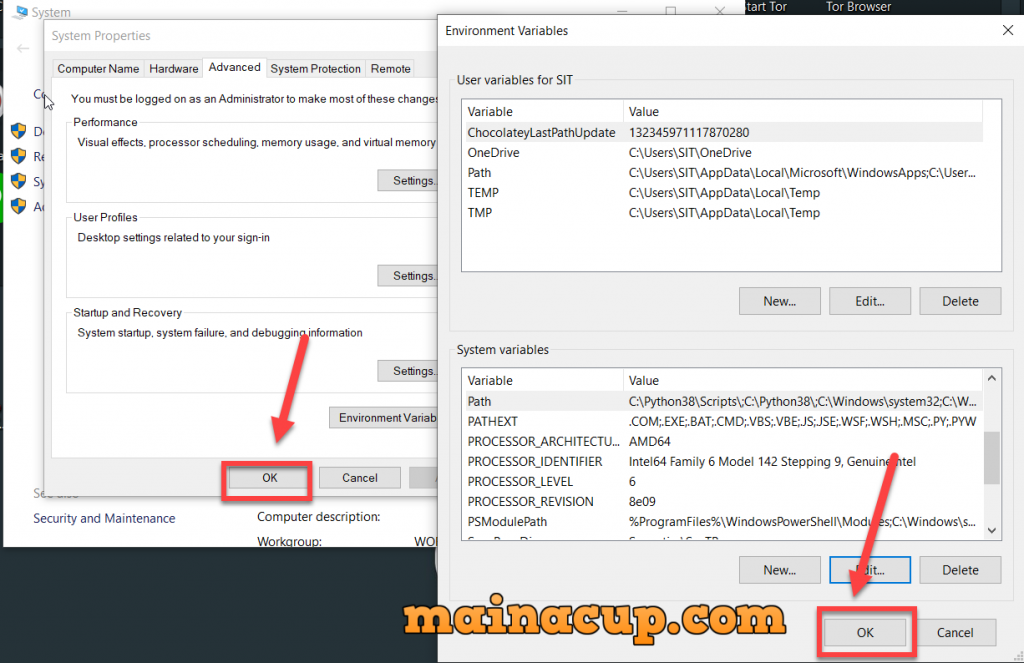
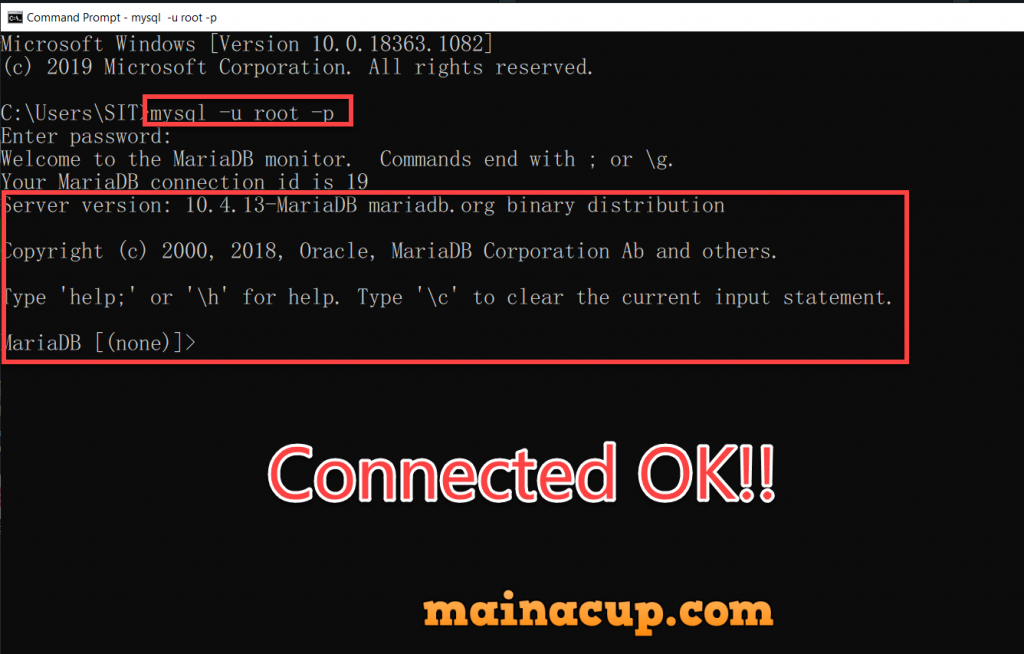
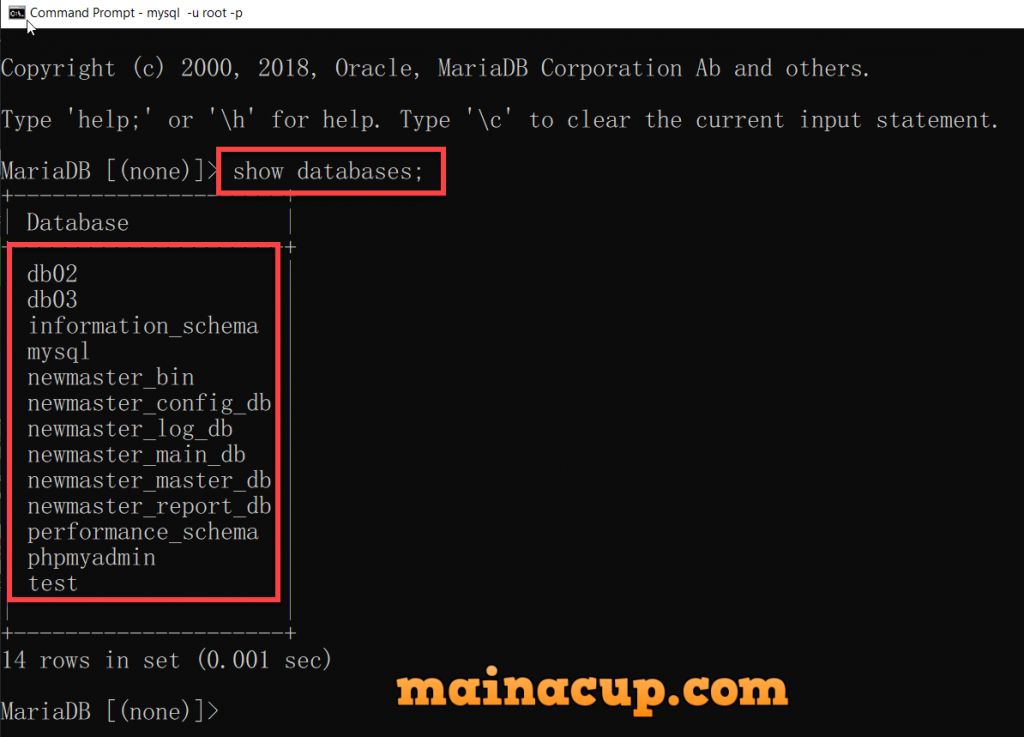
Connect mysql cmd windows
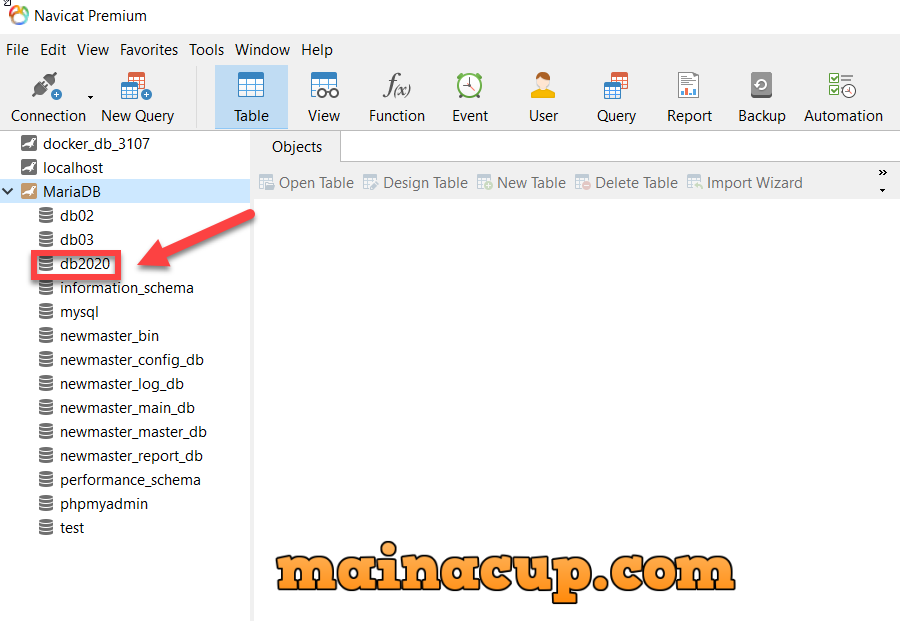
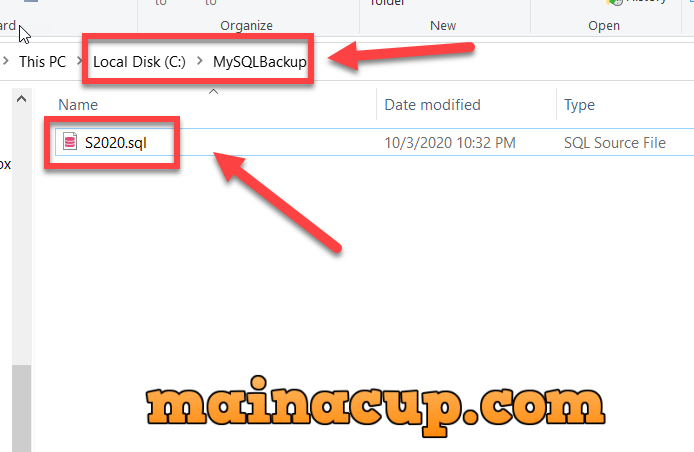
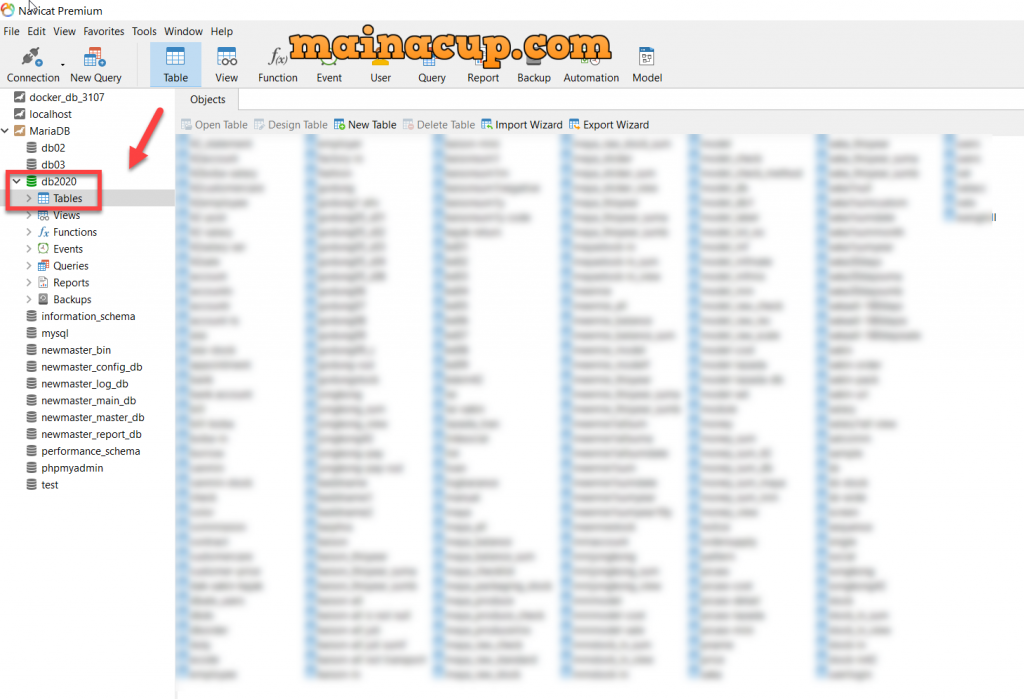
การ Auto Backup Mysql ด้วย Navicat
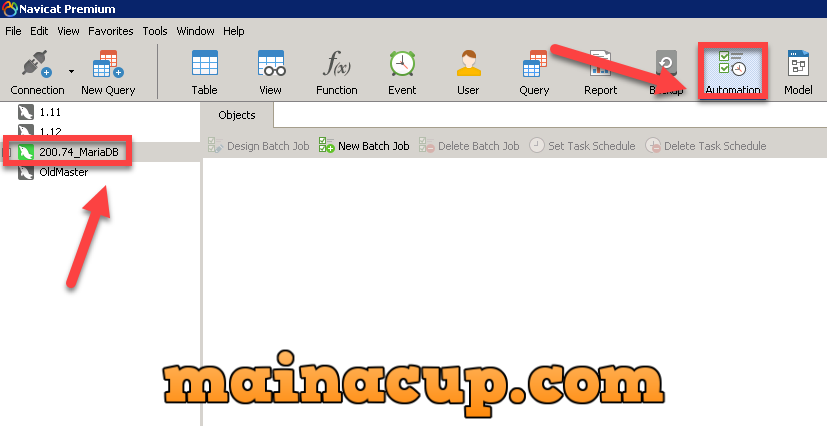
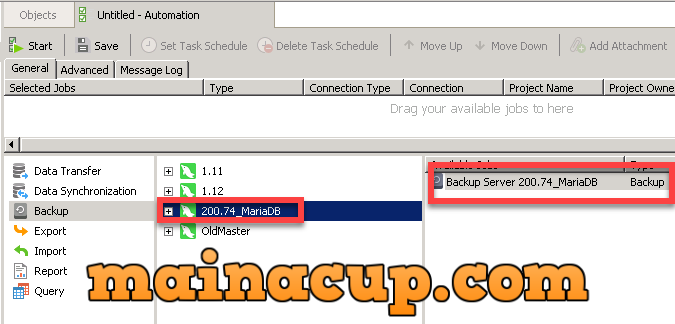
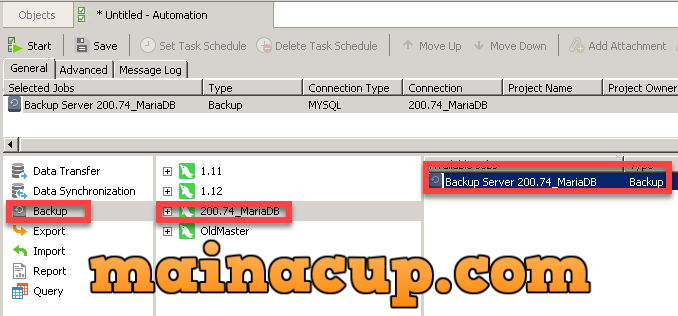
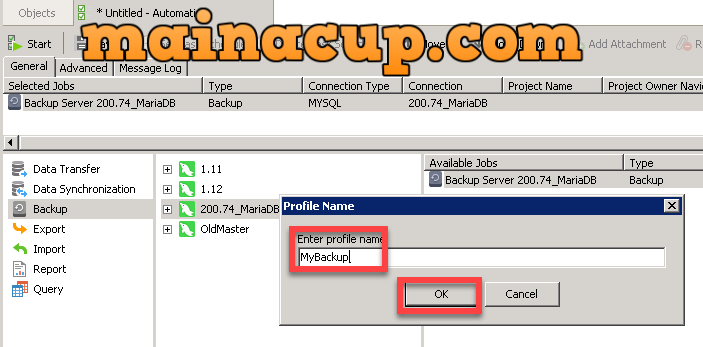
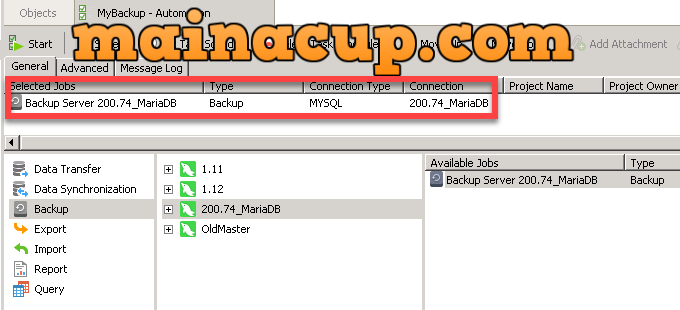
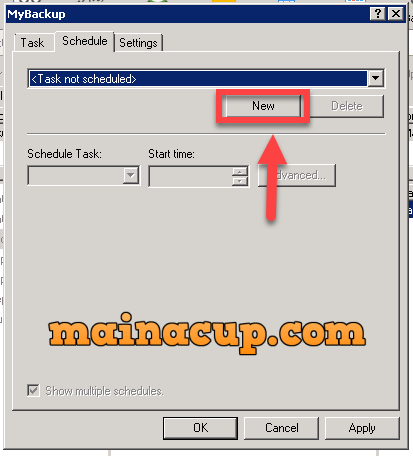
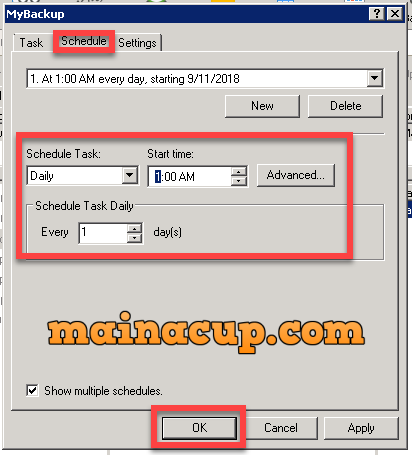
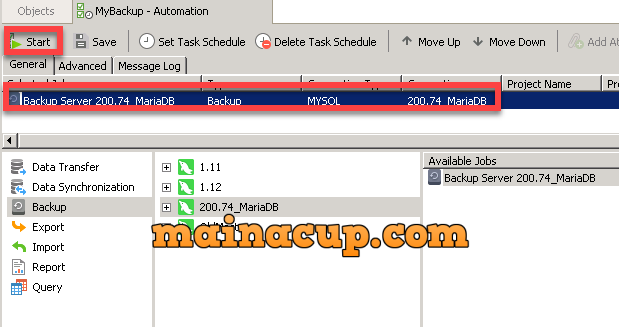
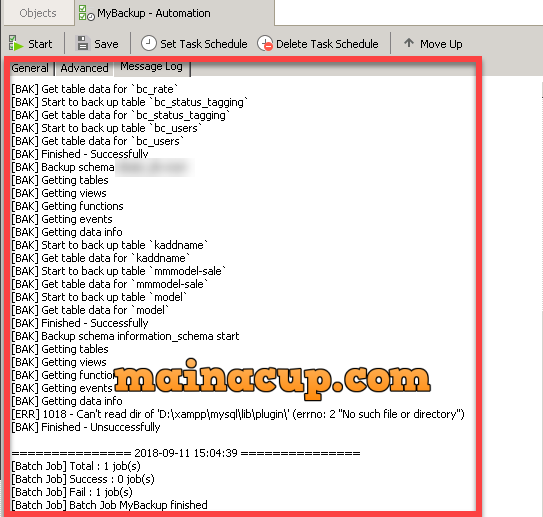
การ Auto Backup Mysql ด้วย Navicat => สามารถดูบทความเกี่ยวกับ Databse เพิ่มเติมได้ที่นี่ Click
สามารถ Download Mysql ได้ที่ Official Website ได้ที่นี่ Click
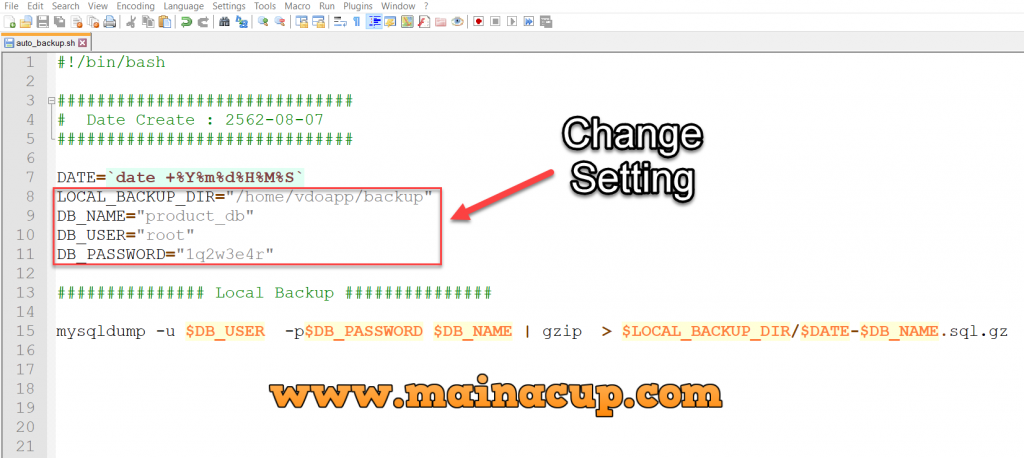
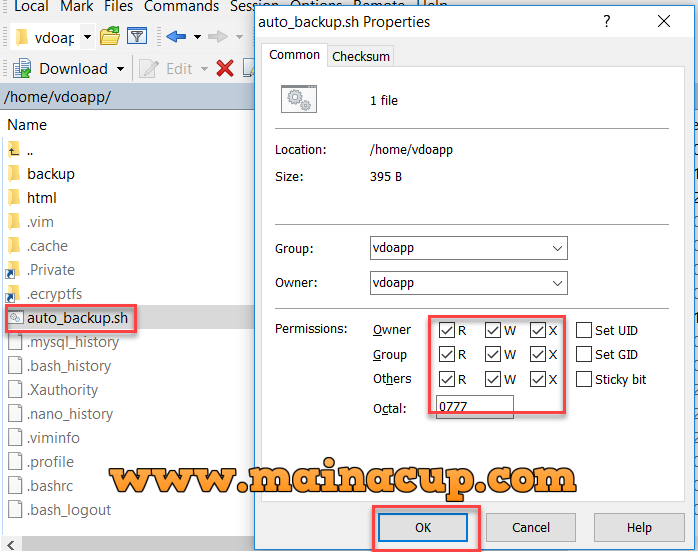
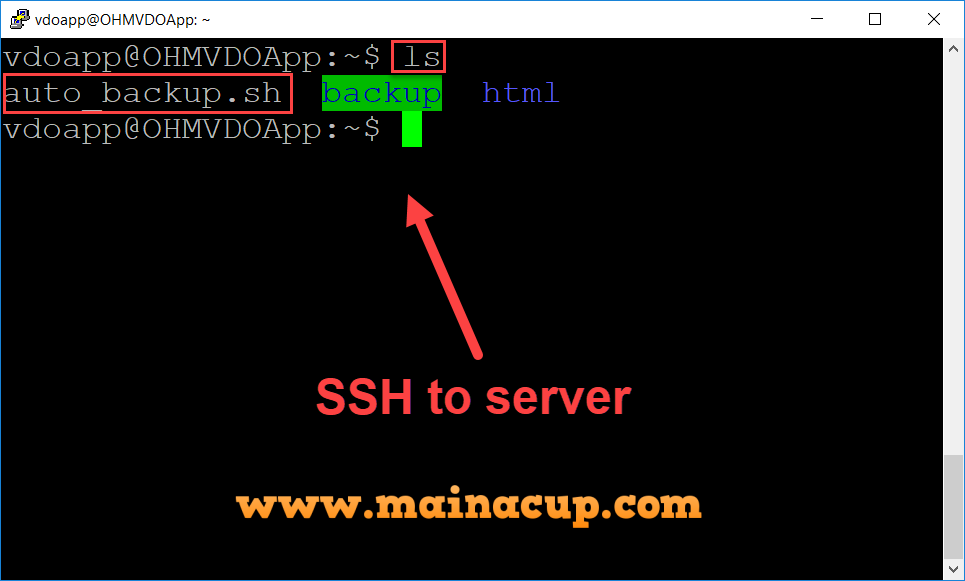
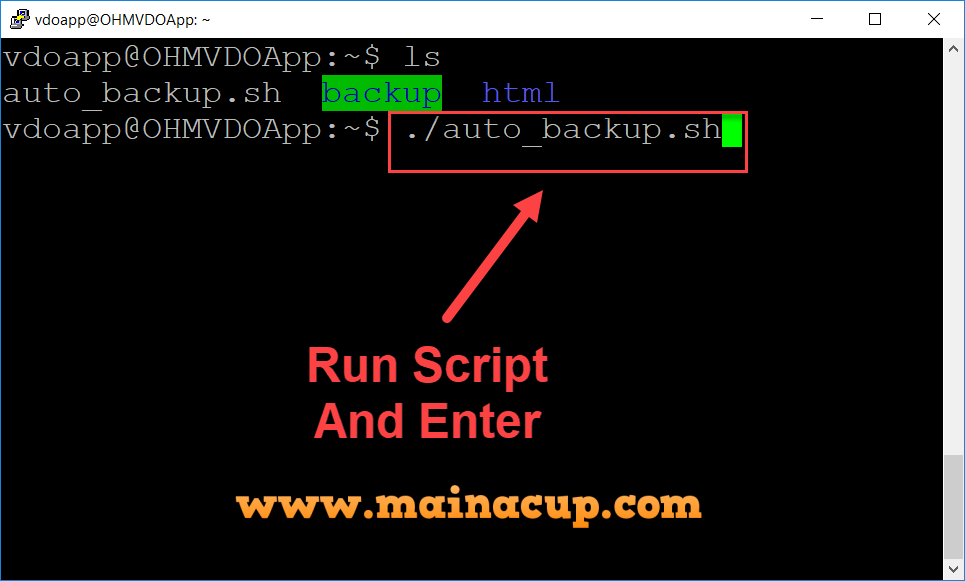
#!/bin/bash
##############################
# Date Create : 2562-08-07
##############################
DATE=`date +%Y%m%d%H%M%S`
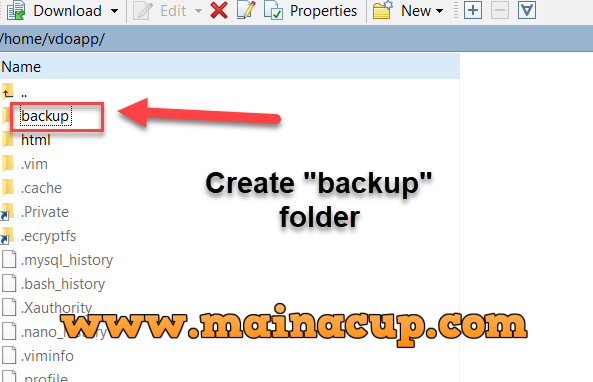
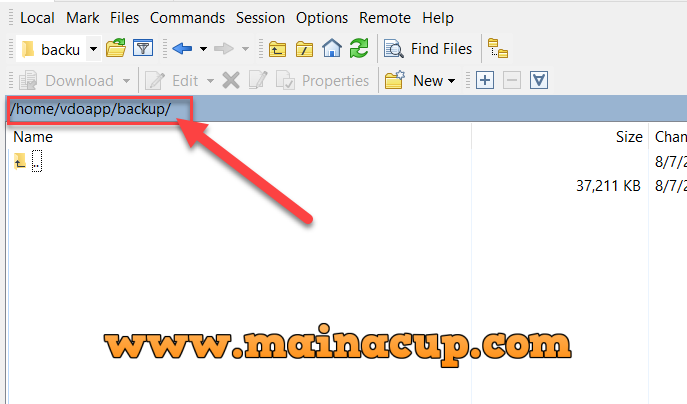
LOCAL_BACKUP_DIR="/home/vdoapp/backup"
DB_NAME="product_db"
DB_USER="root"
DB_PASSWORD="1q2w3e4r"
############### Local Backup ###############
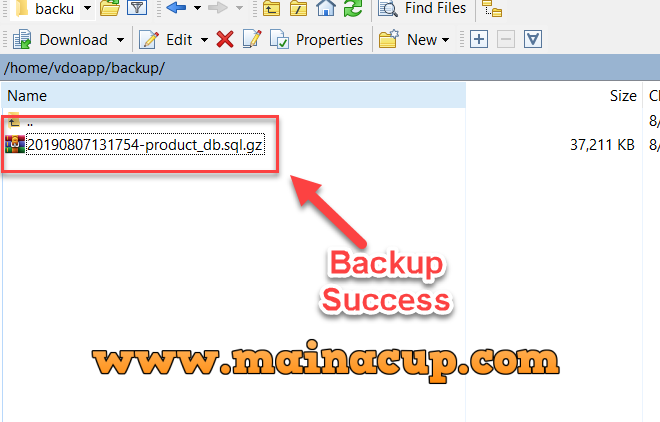
mysqldump -u $DB_USER -p$DB_PASSWORD $DB_NAME | gzip > $LOCAL_BACKUP_DIR/$DATE-$DB_NAME.sql.gzการเขียน Shell Script เพื่อ Backup Mysql แบบ GZip บน Linux


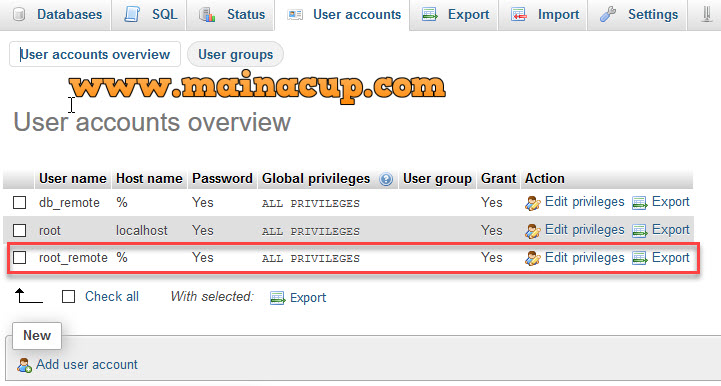
การตั้งค่า Remote Access Mysql บน Centos7 Linux ได้
Setup Mysql Remote Access for Linux Centos7
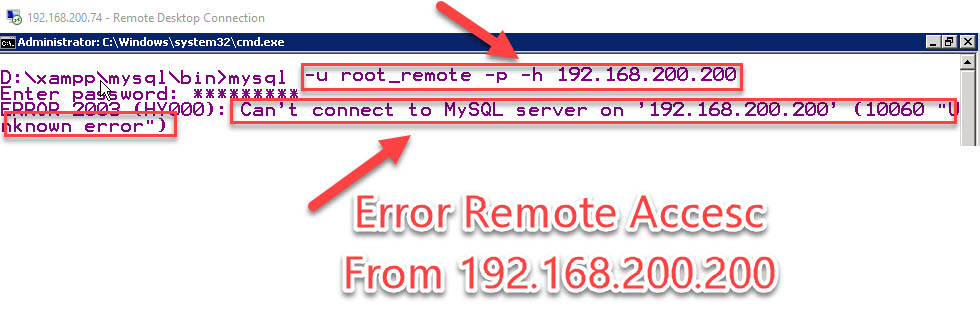
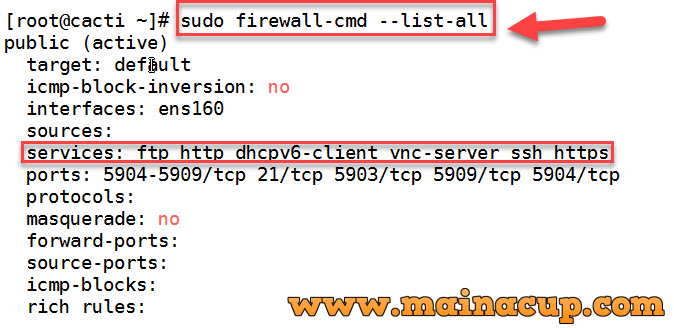
cannot connect mysql server 10061 centos 7
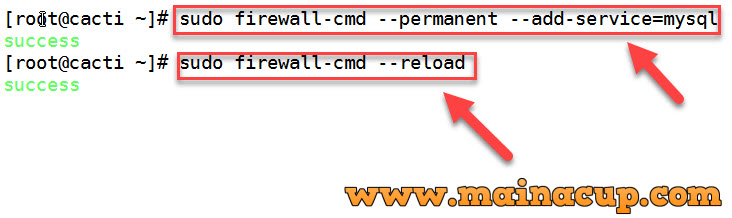
- sudo firewall-cmd --list-all
- sudo firewall-cmd --permanent --add-service=mysql
- sudo firewall-cmd --reload
- sudo firewall-cmd --list-all
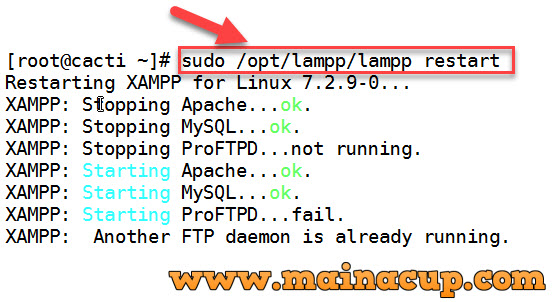
- sudo /opt/lampp/lampp restart


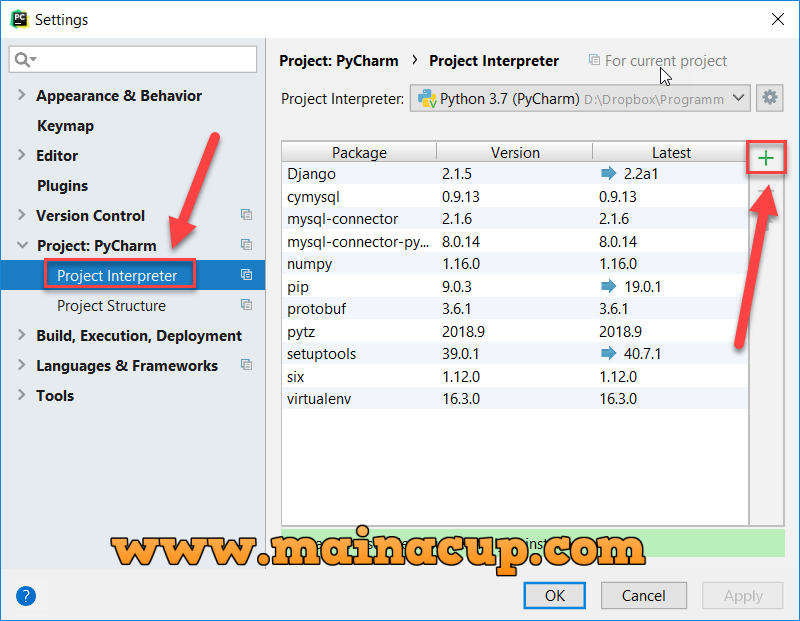
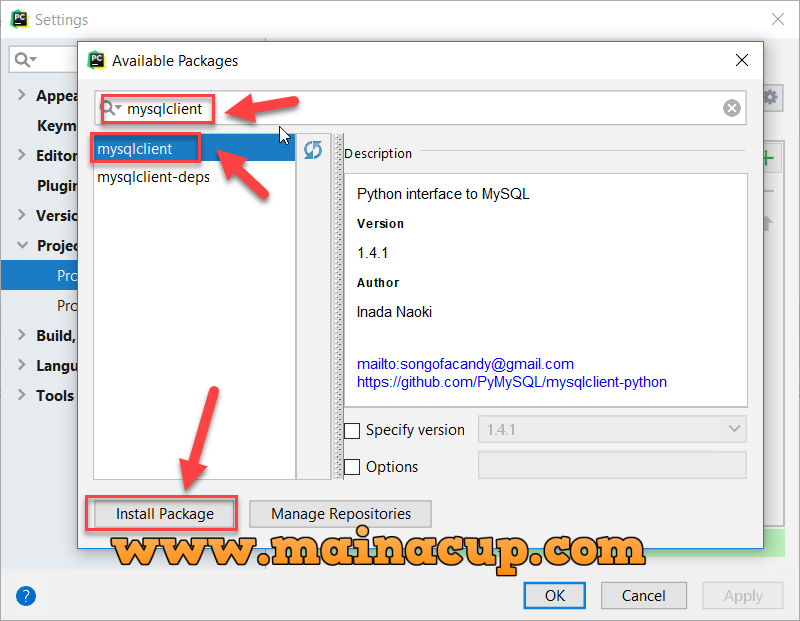
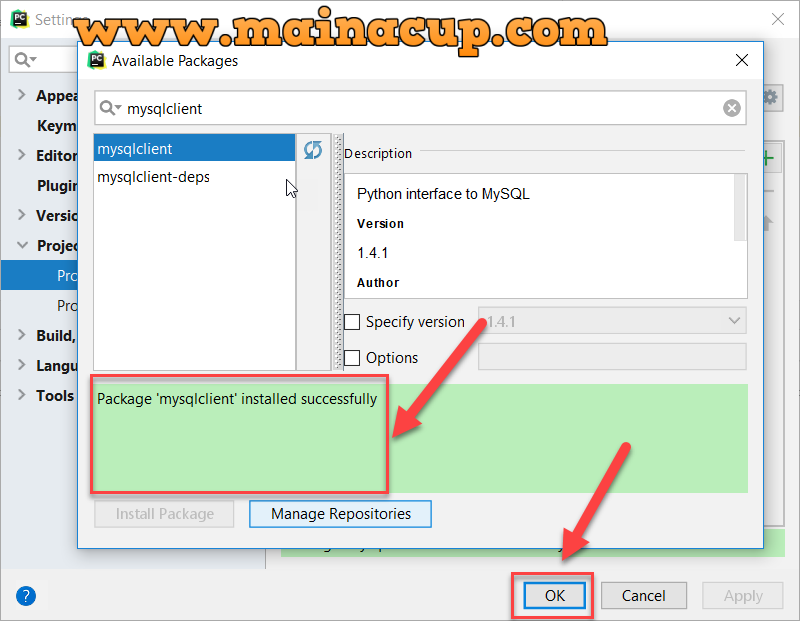
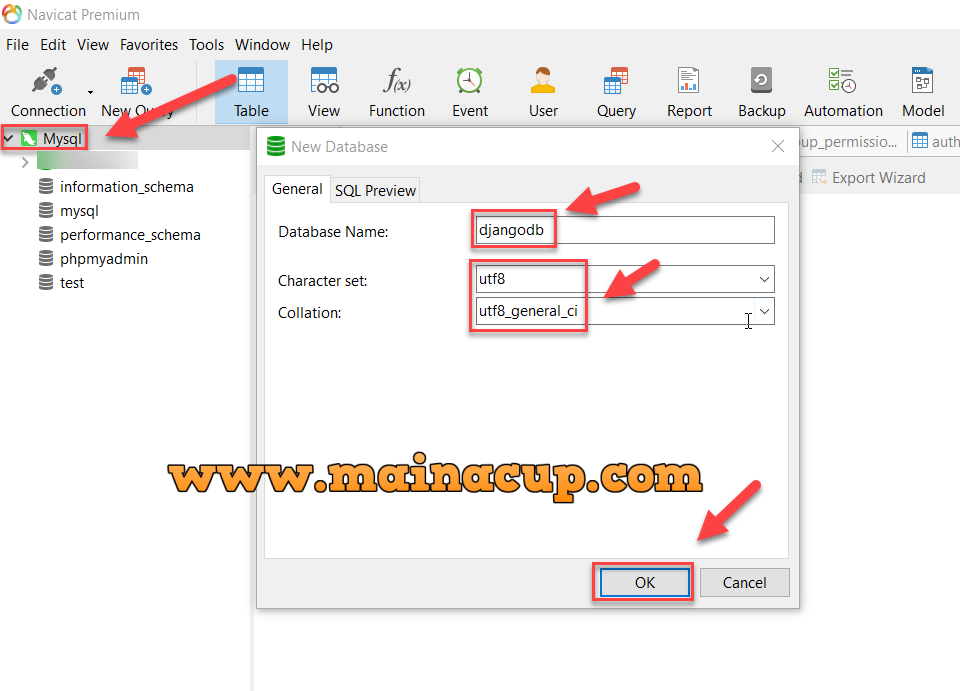
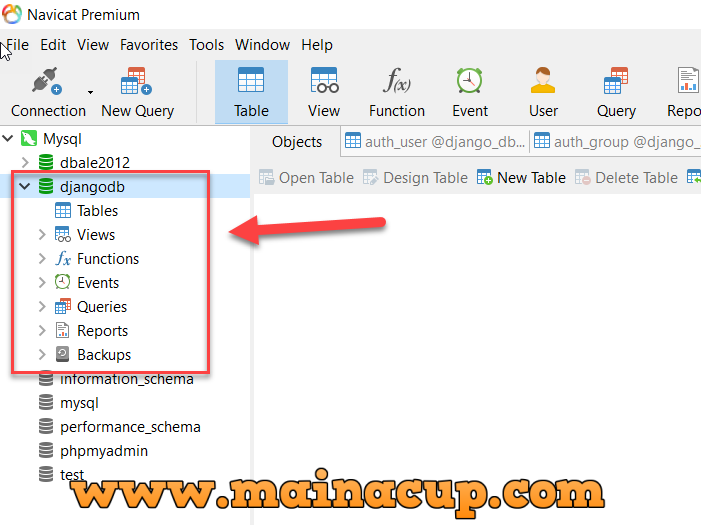
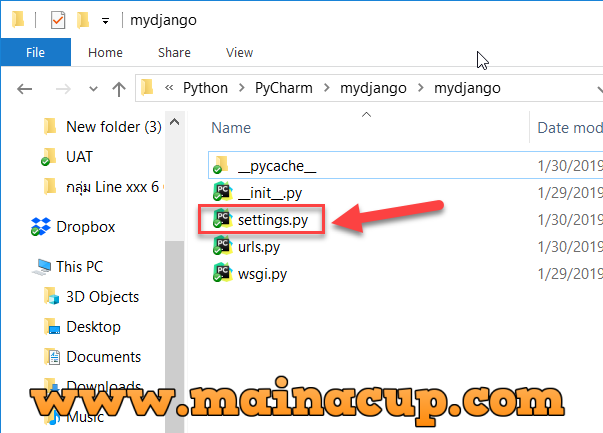
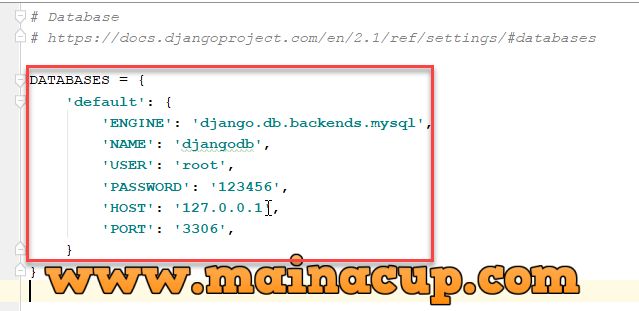
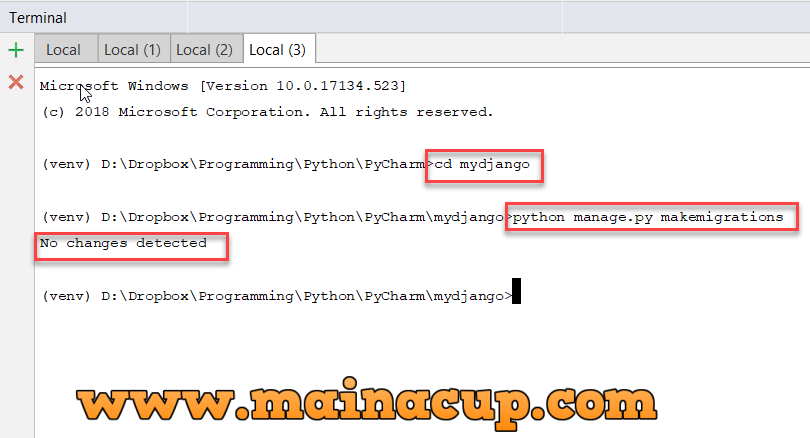
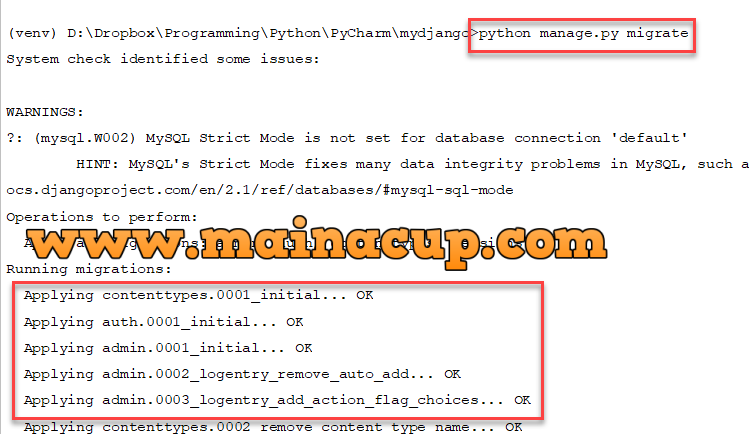
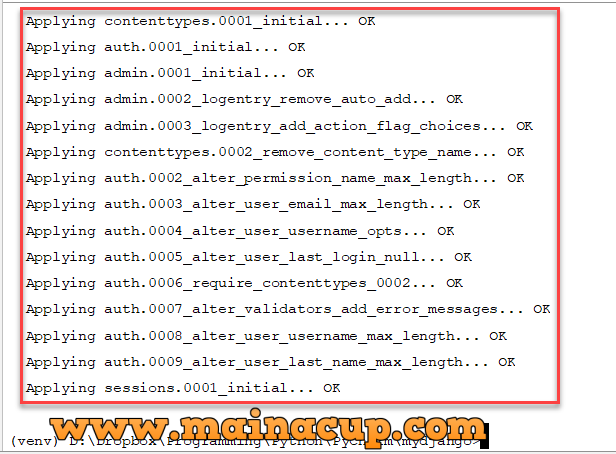
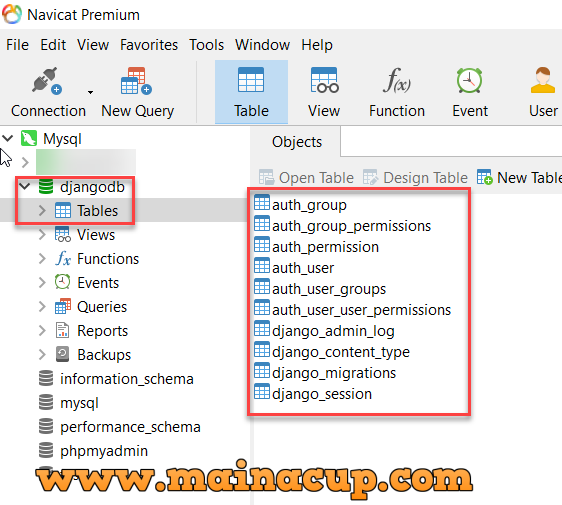
การเชื่อมต่อ Django กับ Mysql
DATABASES = {
    'default': {
        'ENGINE': 'django.db.backends.mysql',
        'NAME': 'django_db',
        'USER': 'root',
        'PASSWORD': '123456',
        'HOST': '127.0.0.1',
        'PORT': '3306',
    }
}
TIME_ZONE = 'Asia/Bangkok'


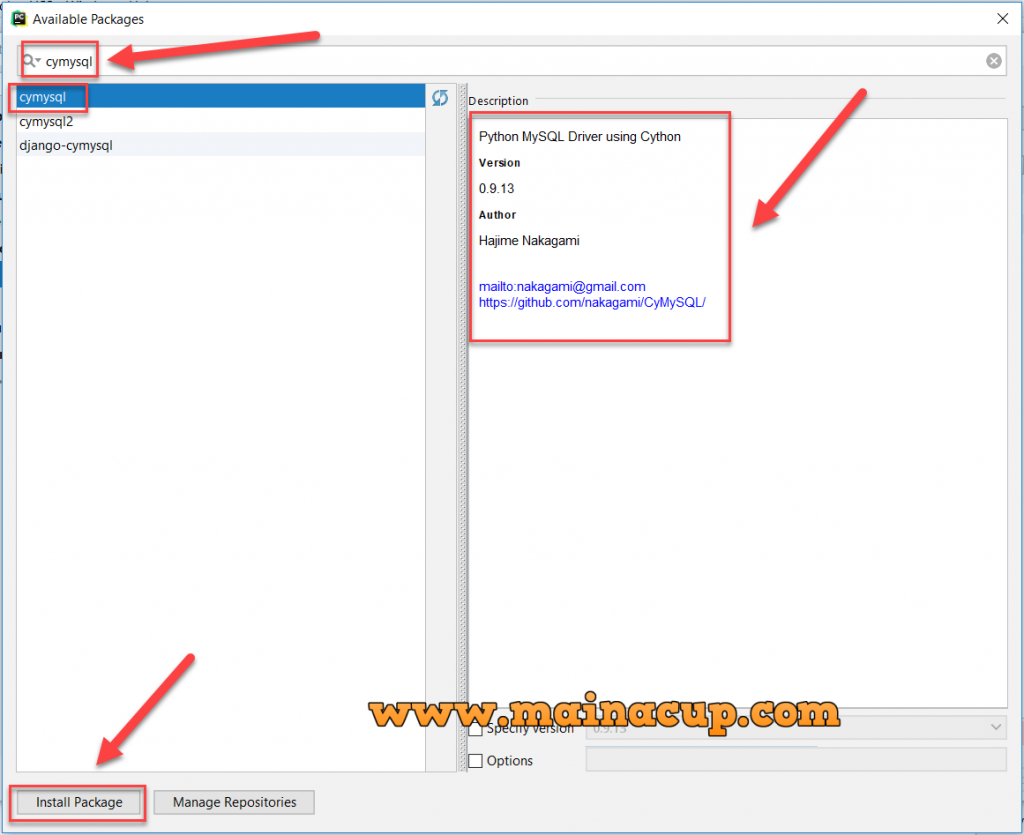
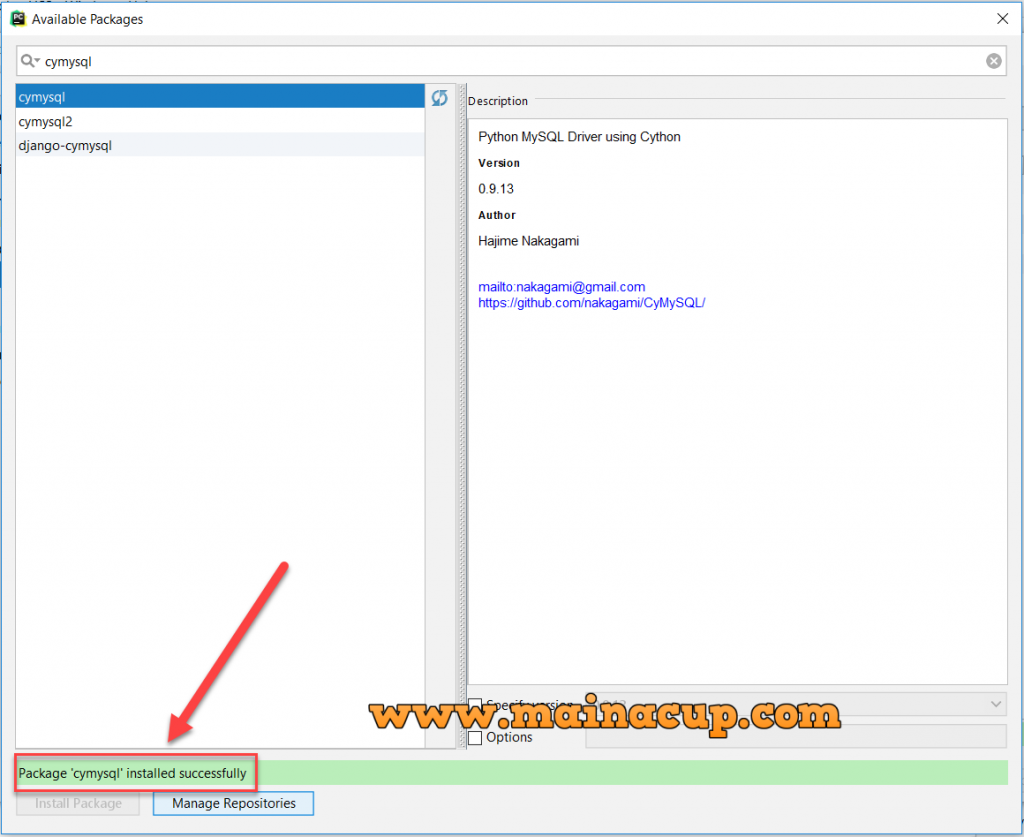
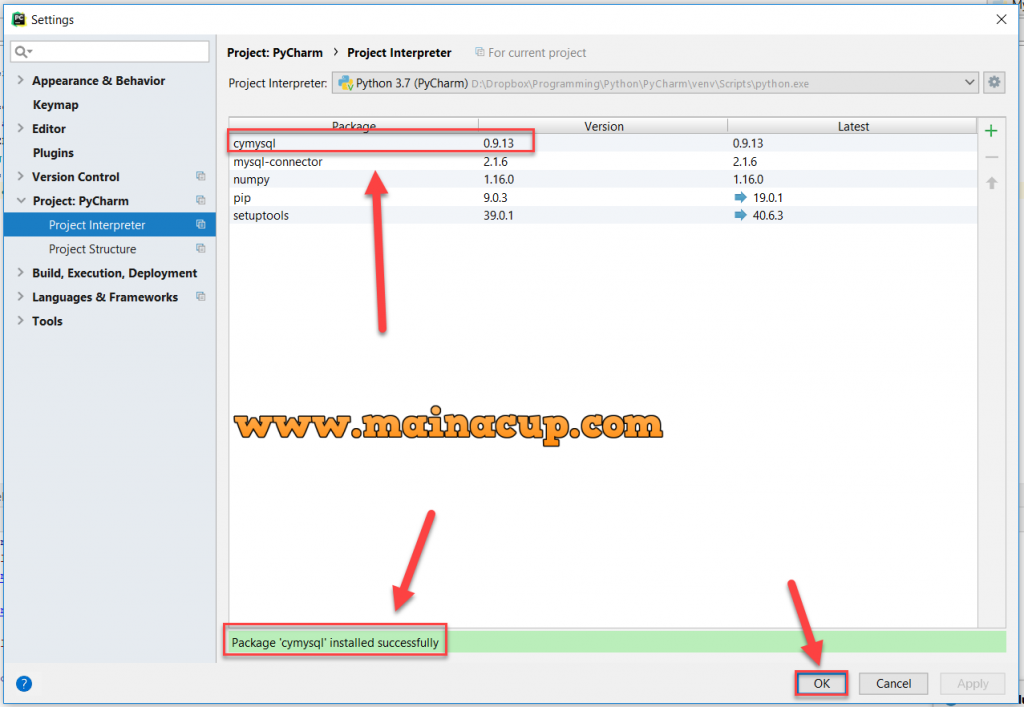
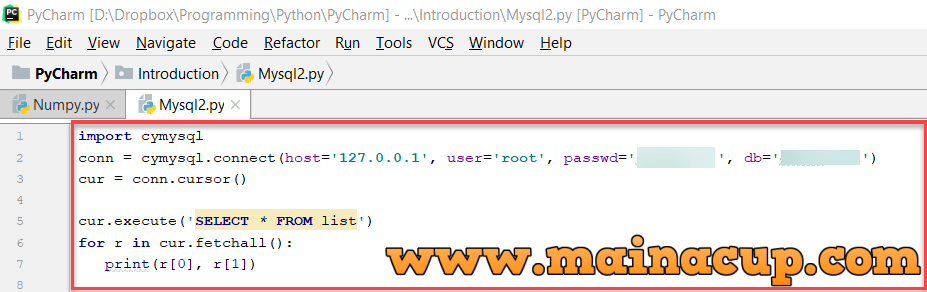
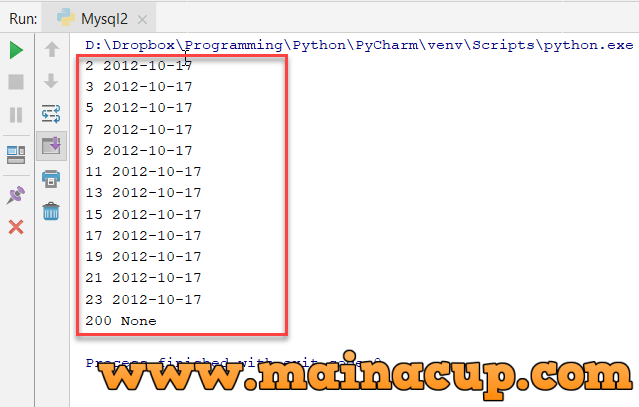
import cymysql
conn = cymysql.connect(host='127.0.0.1',
user='root', passwd='123456', db='db2012')
cur = conn.cursor()
cur.execute('SELECT * FROM list')
for r in cur.fetchall():
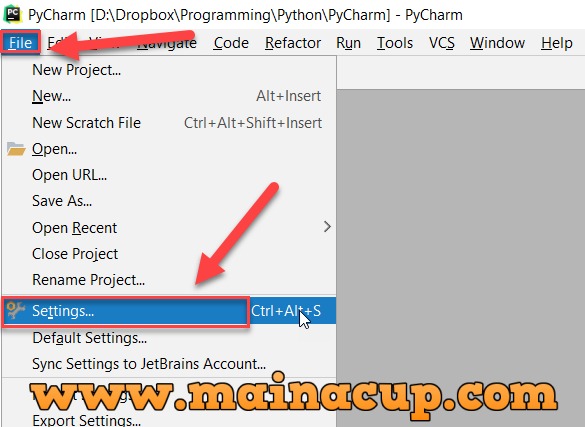
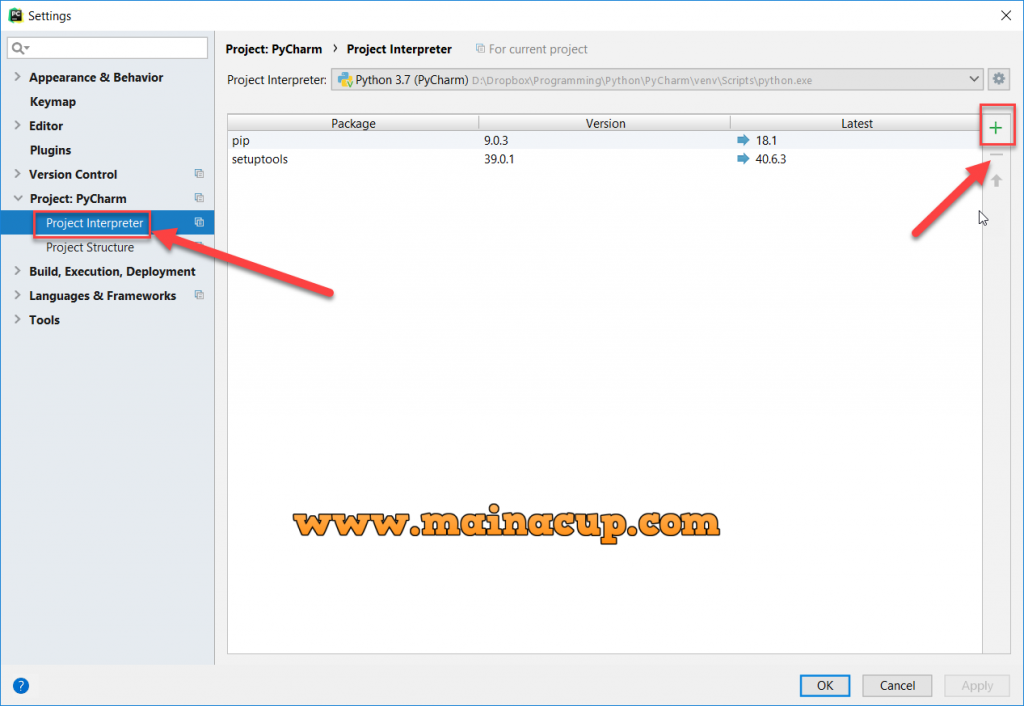
print(r[0], r[1])การเชื่อมต่อ Python3 กับ ฐานข้อมูล Mysql ด้วย cymysql
python mysql example
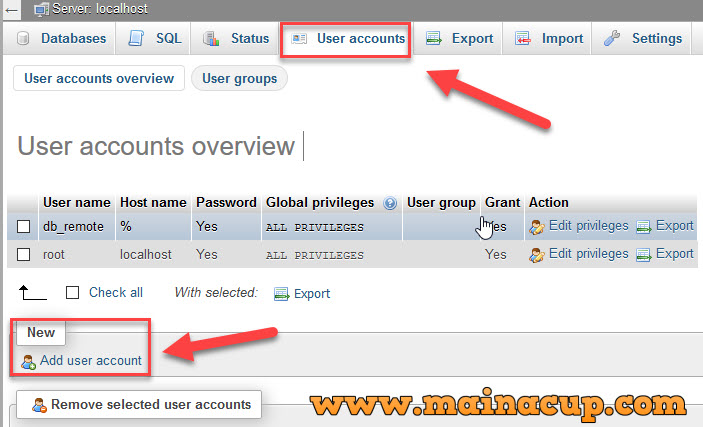
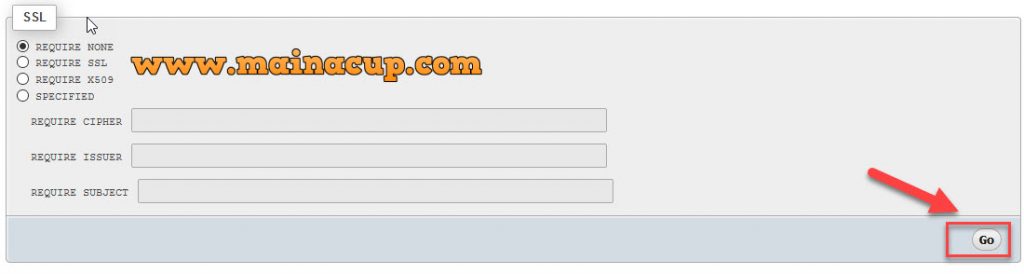
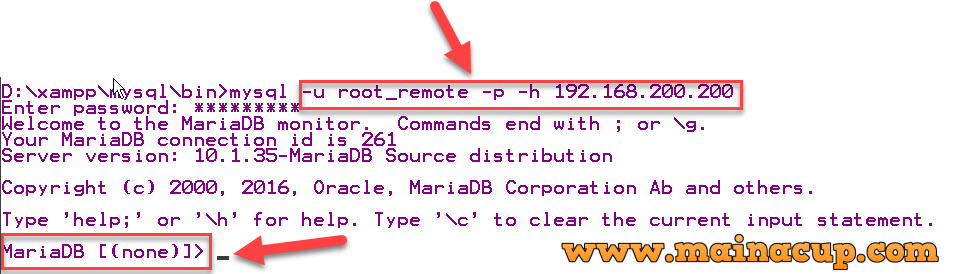
การตั้งค่า Remote Access Mysql บน Centos7 Linux
cannot connect mysql server 10061 centos 7
การตั้งค่า Remote Access Mysql บน Centos7 Linux

การตั้งค่า Remote Access Mysql บน Centos7 Linux
การตั้งค่า Remote Access Mysql บน Centos7 Linux
การตั้งค่า Remote Access Mysql บน Centos7 Linux
การตั้งค่า Remote Access Mysql บน Centos7 Linux
การตั้งค่า Remote Access Mysql บน Centos7 Linux
การตั้งค่า Remote Access Mysql บน Centos7 Linux

การตั้งค่า Remote Access Mysql บน Centos7 Linux

การตั้งค่า Remote Access Mysql บน Centos7 Linux

การตั้งค่า Remote Access Mysql บน Centos7 Linux

การตั้งค่า Remote Access Mysql บน Centos7 Linux